01219245/repository setup
- This is part of 01219245.
There are a few reasons why you would want to host your Git repository.
- It makes sharing codes easy. (This is the main point for our class, because I have to look over your work in the course.)
- There are additional tools that these Git hosting websites provide, e.g., issue trackers and wikis.
- You have all your development code backed up. So, you don't have to worry that your notebook's hard disk might be broken and you have nothing left.
In this course, you have to host your Git repository (that contains your code and assets) on the web. Here are two main choices for the services:
- GitHub - if you want your repository to be publicly viewable, GitHub is the famous choice.
- BitBucket - also hosts Git repositories. If you want a private repository, BitBucket has a free plan for you if you have no more than 5 collaborators.
Both services also provide GUI applications for maintaining Git repository. While we encourage the usage of Git command line, but if you want to use the GUI version provided by the services, it is OK.
Getting started
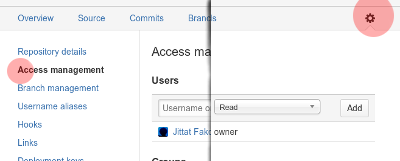
Pick the hosting service (GitHub or BitBucket) and create a repository for your project. If you create a private repository in BitBucket, don't forget to add me (jittat@gmail.com) to the project with Read permission. See figure below, for BitBucket:
After that, you will have an empty repository at the server. The next step depends on if you have a local repository for the project. If you have not done anything, you can just clone the repository from the server and start developing. If you have implement some of the game and have local repository, you should start by adding the remote origin and then push your code to the server.
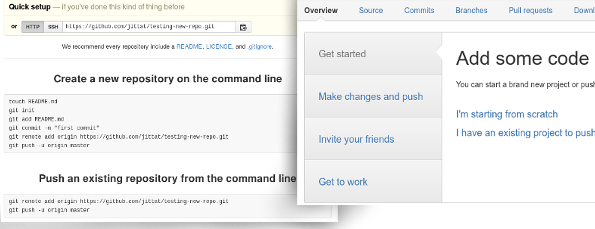
Both GitHub and BitBucket show the instruction for you to get started after creating the repository. (Shown below, github (left), bitbucket (right).)
You can just follow the instructions. Here are another instructions and the explanation of their steps.
- If you have no local Git repository (i.e., you start a new project):
- You should start with our template as if you are starting to work on the tutorial. Unzip the template. Rename the template directory to your project's name.
- Create a Git repository by calling git init in your project directory.
- Create .gitignore if you need.
- Add the files from the template.
- Commit the changes, so that you have something to push to the remote repository.
- Now depending on the services (GitHub or BitBucket), you should add the remote origin.
- Both websites would show you the command that begins with git remote add origin follow by the repository URL.
- Run that command to add the remote origin to your local Git repository.
- Then push your first change to the server by calling git push -u origin master
- If you have your local Git repository:
- Change directory to your Git directory.
- Add the remote origin. Follow the instructions the service provides you. The command should start with git remote add origin follow by the repository URL.
- Push your repository with: git push -u origin master
Basic work flows
The work flow for an individual is easy:
- To get commits from the remote repository to your local repository, you pull.
- To put recent commits from your local repository to the remote, you push.
- If you want to start working on the repository on another machine, you clone the repository.

